Let me start by saying that I am no expert when it comes to painting furniture. In fact, that is an understatement! I had a bad experience back in law school when I cluelessly painted a cheap wood-laminate bookshelf using latex paint... the first coat went on ok, but when I tried to paint the second coat, each brush stroke just peeled up the paint from the first coat. It was a hot mess and I vowed that I would never paint furniture again!
Fast forward ten years and I had gained a lot DIY skills and understood how silly I was to ever think I could paint a laminant surface without sanding or priming! But sanding and priming sounded like an awful lot of work, so I continued with my vow to not paint furniture.
Around this same time I started reading blogs and learned about a new {new to me, anyway} product called chalk paint. It seemed to be all the rage and everyone was using it to paint gorgeous pieces of furniture. It looked cool, but I was always confused about why people would want chalkboard paint on their dressers and chairs. It was one of those questions that always lingered in my mind, but that I never asked out loud because somehow I knew that I was missing something and that asking the question would draw attention to my naïveté.
Finally, I took the time to do some internet research and figured out that chalk paint and chalkboard paint are NOT the same thing! Even more importantly, I learned that with this amazing product called chalk paint, you can actually paint without the dreaded sanding and the extra step of priming. And just like that I no longer had any excuse not to try painting furniture again.
I now have one successful project under my belt, and while I am definitely still not an expert furniture painter, I am not longer so intimidated, and I can even share a few tips for other newbies out there. So here's my chalk paint story of challenges but ultimate success...
We purchased a Hemnes dresser in black-brown from Ikea for Beckett's "big boy" room because both the size and the price were just right, but with so much other dark furniture going into the room, I wanted to do something to lighten up the dresser a bit. I thought about painting the entire dresser grey, but once we settled on a blue grey for the walls, I thought the whole thing in grey might not be the best choice. In the end, I decided to paint just the drawer fronts grey. I love way it looks, and it allowed me to dip my toes in the world of painting furniture with a small and manageable project.
I have heard wonderful things about the Annie Sloan line of chalk paint, but recently I had read a few positive reviews of a new brand of chalk paint by DecoArt called Americana Decor Chalky Finish. The price was considerably less than the Annie Sloan brand, and the color options similar, so I decided to give the Americana Decor chalk paint a go, and I selected a light grey color called Yesteryear.
I felt like I was doing something wrong by just sitting down to paint without any prep work, but the first coat went on like a charm and I could feel it gripping to the surface of the drawers. By the time I painted all 8 drawer fronts, the first ones were already quite dry and ready for a second coat. After three coats {over the course of 2 days}, the drawers were a nice solid light grey color.
I followed all of the instructions and made sure to work in long, continuous strokes from one end of the drawer to the other {rather than in short overlapping sections}. After 3 coats of paint, I had achieved good coverage, but I was distressed by the number of brushstrokes I was seeing. I thought surely I must be doing something wrong, because I had read many tutorials saying that while brushstrokes may initially be visible, they will disappear as the paint drys. Unfortunately, after my paint dried, the brushstrokes were still there. Here's a close up so you can get a better idea of what I'm talking about.
I followed the painting instructions, applied thin coats, used an inexpensive chip brush {as was recommended by all the tutorials I read} ... but I wasn't getting that nice smooth finish I had expected. I thought maybe I was discovering the hard way why the Americana Decor chalk paint is so much less expensive than the Annie Sloan paint. Either that or I was doing something wrong {which I assumed was a good possibility seeing as how this was my first attempt with chalk paint}.
I grabbed out the computer and did some research to figure it out. I came across a great blog post by Emily of Decorchick {who I totally trust and respect}, and learned that she had the same experience - too many brushstrokes even though she had used the Annie Sloan brand! So maybe it wasn't the brand of paint after all. Emily shared that she had sanded between coats, and that the paint felt nice and smooth, but that the appearance of brushstrokes remained. The comments on Emily's blog post were enlightening, with several people pointing out that chalk paint is often used to achieve a distressed look {with the several colors of paint dry brushed over one another, edges sanded down and several coats of dark and light wax finishes used to add color variation and "age"}, and that perhaps the layering of different techniques goes a long way to minimizing the look of the brushstrokes. That makes perfect sense, but I was going for more of a modern look, so it was back to the drawing board for me.
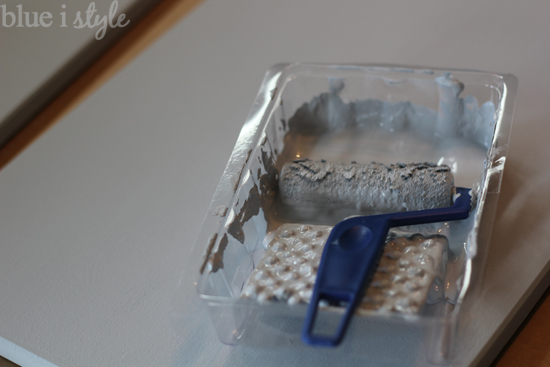
I grabbed out my sandpaper and went to town on the drawers. After sanding, the drawers were going to need another coat of paint, but I wasn't about to reapply the paint with the same brush or I would end up right back in the same spot. All of the instructions I read said explicitly not to use a roller with this paint, but I am a rebel I was feeling desperate, so I grabbed out a small foam roller and went for it.
Imagine my relief when the paint dried and I was left with a perfectly smooth finish! I was thrilled, but a little confused.
Why all the fuss about not using a roller when I got such great results? I knew I'd be writing about my experience here, and I don't want to lead you astray with bad advice, so I wanted to find out if there was a reason I should be warning you off of using a paint roller. Here's the best explanation I was able to find - chalk paint is not cheap and paint rollers suck up {read: waste} a lot of paint. That makes sense, and is obviously more of a concern if you are using the Annie Sloan brand which is more than twice as expensive as the DecorArt chalk paint.
Despite my frustrations along the way, in the end I actually think I stumbled my way into an ideal solution... Step 1: apply two or three coats of chalk paint with a paintbrush to get good, solid coverage. Step 2: Sand down the brushstrokes. Step 3: Use a foam roller to apply a final coat of paint. By only using the roller for the final coat, I minimized paint waste, but still got the nice, smooth finish I wanted. Now if you are able to achieve a smooth finish with just a brush alone - even better, but if not, then hopefully my experience will help you achieve your desired result!
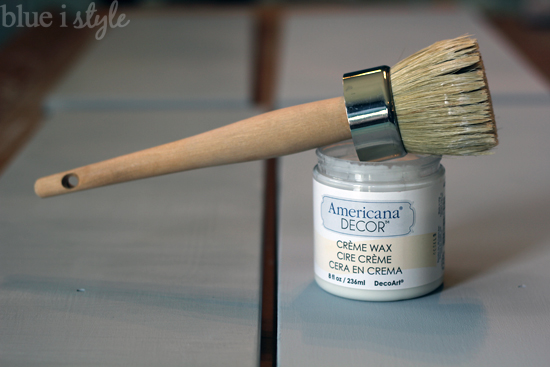
Ok, now let's talk about the final step in the chalk paint process - the wax. Because chalk paint has a dull, matte finish, it is recommended that you apply a wax after the paint is completely dry.
The wax can serve several purposes. If you are going for an antique look, a dark color of wax provides an aged patina. On the other hand, a clear creme wax simply eliminates the dull, chalky appearance and brings out the color of the paint - but more importantly it acts as a sealer that prevents the dry chalk paint from cracking or scratching over time.
I purchased the recommended waxing brush from Home Depot {by far the most expensive part of this entire project at about $22}. I don't know if this expensive brush was really necessary, but I was happy with the wax finish when I was done. Here's a photo of one of the drawers with wax on the back half, and no wax on the front half to give you a better idea of how the wax enhances {and slightly darkens} the color. You'll also notice in this photo that I opted to apply the wax in continuous strokes the short way across the drawers, rather than the long way.
While the creme wax takes away the "chalky" appearance of the chalk paint, it still dries with a matte finish. I was happy with this matte look, so I stopped here. But if you prefer a bit more shine, use a clean cloth to buff the wax after it is dry. The more you buff, the shinier the finish will become.
So, as the title of this post suggests, despite my brushstroke challenges, I am really happy with the way my painted drawers ultimately turned out, and I love they way they contrast against the dark dresser. Of course, the dresser wouldn't be complete without the leather belt drawer pulls - and I'll give you lowdown on those very soon.
Click here to see even more pictures of the dresser in the completed room.
Bottom line - would I paint with the Americana Decor chalk paint again? Without a doubt. And maybe next time I'll even be brave enough to paint an entire piece of furniture.
The links below include all of the other projects that went into the creation of the Vintage Preppy Little Gentleman's Lounge:
Labels: bedroom, chalk paint, decor, decorating, DIY, drawers, furniture, One Room Challenge, paint, tutorial