
And today, I've joined with some other fabulous bloggers that have created 17 more fantastic DIY costumes for kids and adults alike. You'll find photos and links to all of these other fun costume ideas at the end of this post!

If you are of the Reading Rainbow generation {like me}, then you're likely to recognize my kiddos Halloween costumes right away! And if not, then you are probably pretty confused. The good news is that son would be happy to explain by reciting the entire book for you, word for word {as he tried to do on each and every porch where we trick or treated last year}!
"Caps for Sale," by Esphyr Slobodkina, was one of my favorite book as a child, and now it has become one of my boys' favorites as well. For the better part of a year, this book was our must read before bed every night! If we tried to skip it... well, we couldn't. Skipping it just wasn't an option!
About a month before Halloween last year, I excited suggested to Beckett {then 2 and a half} that he could be the peddler from "Caps for Sale" for Halloween. I expected a resounding yes, but instead I got a flat NO. After lots of questions about what he did want to be, we finally settled on a different costume idea.
But, in true kid fashion, just two days before Halloween I picked Beckett up from preschool, only to learn that he had told all of his teachers and friends that he was going to be the peddler, and that his little brother, Cooper, was going to be a monkey. When I reminded him of the costumes we had planned, he cried and begged to be the peddler. He was just too cute to say no to, so I spent the next two days making calls and driving around town to find the right colored caps and a monkey costume {there was no way I was going to try to DIY the monkey at the last minute}.
For those not familiar with the story of "Caps for Sale," let me explain...
"Once there was a peddler who sold caps. He carried them on top of his head. First he had his own checked cap, then a bunch of gray caps, brown caps, blue caps, and red caps on the very top. He walked up and down the street calling, 'Caps! Caps for Sale! Fifty cents a cap!'"


Monkeys!


In the book, the monkeys tease the poor peddler, but in our version, the peddler and the monkey are actually best buds!

Next up, I had to find the hats for the peddler. Luckily, Beckett already owned a black and white checked hat and a gray hat {both cabbie style from the boys' department at Target}, and I already owned one blue beret {from a prior French costume party}. But, per the story, we still needed a red and a brown cap for Beckett, and we also needed one more cap for Cooper-monkey.
After trips and phone calls to many costume shops, I finally found one that had a tan beret and two red berets in stock. At 7 pm. The night before Halloween. Talk about cutting it close. {If you are planning ahead, even just by a few days, you can save the hassle and order the colors you need here.}
Fortunately, I have the best husband and the best mom! Scott drove across town to buy the hats after work, and my mom showed up at 10 pm with all the other needed supplies in hand:
- Thread - red, blue, beige, gray and black
- Needle and scissors
- Batting
- Elastic
- Safety pins {several}
- Optional - fake pocket watch and ribbon

The blue beret that I already owned was gathered with elastic, but the red and tan berets had wide openings that were going to make them difficult to stack with the other hats. So the first thing we did was use a simple, temporary, gathering stitch around the base of the red and tan hats. For this, we used a contrasting thread that would be easy to see and clip to remove later - it didn't matter that it didn't match because this stitch would not be visible once the hats were stacked.


After my mom stitched all the way around the base of the hat, we pulled the thread tighter to gather in the base of the hat. Here's the difference between the flat red beret and the one with the gathering stitch.

Once the red and tan hats were gathered, we filled each hat {except for the black and white checked hat, which would go directly on Beckett's head} with a little bit of batting. In the book, the peddler has multiple hats of each color in his stack, but since we were using just one of each, adding the batting gave the hats more volume and ensured that the stack of hats would sit taller on Beckett's head.

Once the hats were filled, we then used a wide running stitch to stitch the hats together, one on top of another, in the order described in the book - first the checked cap, then a gray cap, brown cap, blue cap, and a red cap on the very top. As we stitched the hats together in a stack, we matching the thread to the upper hat each time.

Finally, we stitched a piece of white elastic to the bottom, checked cap. This elastic went under Beckett's chin, making it easier for him to keep the stack of caps on. {They also sell flesh colored elastic that would have been even better, but we were working with what we had.} To attach the second red beret to the head of the monkey, I just used a couple of safety pins.
In the book, the peddler wears checked pants, and black jacket, and a black bow tie of sorts. Since I was pulling this costume together at the last minute, there was no time for checked pants, so we improvised and had Beckett wear his black suit pants. pinstriped suit vest. a white dress shirt, and a black bow tie. For trick or treating, we also added his black tweed peacoat to pull the whole outfit together {and keep him warm, or course}.
My mom happened to have some cute fake pocket watches {purchased at Hobby Lobby}, so tucked one into the top of Beckett's vest pocket flap. We stitched a short piece of silver ribbon around the top of the pocket watch, and then tacked the ribbon down to the vest. This held the watch in place, but was easy to clip and remove after Halloween, returning his suit vest to it's original state.


Here's how it all came together...

Beckett really wanted to carry his book trick or treating with him, but instead I made each of the boys a bag for their candy with the cover of the book on one side, and a picture of their character on the other side!

These bags were a last minute addition {even more last minute than the costumes}. The bags only took me about 5 minutes to make and were completed right before we went trick or treating. I had a couple of small, colorful tote bags left over from a prior project {each is only about 6 inches square}.
I used the copy machine in our home office to copy the front cover of the book directly on to white iron on transfer paper, and then I did the same with two internal pages from the book.
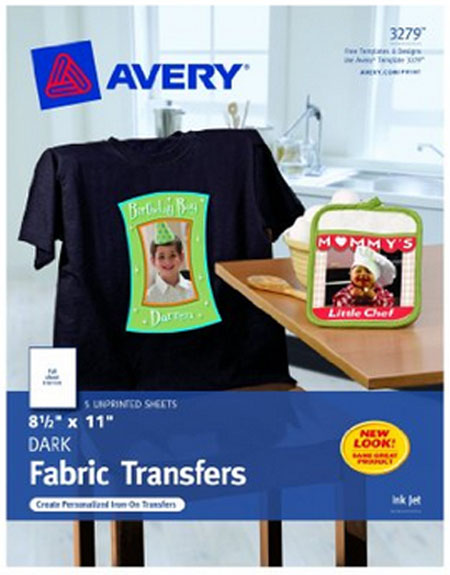
The key here is to make sure your transfer paper is made for use on dark colored fabric - like this Avery Dark T-Shirt Transfer Paper! Once I had the book pages copied on to the transfer paper, I simply cut them out and ironed an image on to each side of the bags. Every brand of transfer paper has slightly different instructions for how long to iron, so be sure to carefully follow the packaging instructions. Nearly a year later, the boys are still carrying their toys and treasures around the house in these cute little bags.
There you have it... a peddler and a mischievous monkey from the classic children's book, "Caps for Sale."


And finally, here are 17 more awesome DIY costume ideas from some very talented bloggers!

DIY Pineapple by Sugar Bee Crafts
Pinata Shoes by Morena's Corner
Easy Mime by Ginger Snap Crafts
Skein of Yarn by Dukes and Duchesses
Caps For Sale by Blue i Style {you are here!}
No Sew Mermaid Tutu by 365 Days of Crafts
Disney Frozen by Foster2Forever
Plants v. Zombies by Twin Dragonfly Designs
Inside Out Bing Bong by Desert Chica
Princess Anna Apron by Ruffles and Rainboots
Modern Mother Earth by BumbleBree Blog
Panda Costume for Teens by Three Mint Balloons
Woodland Fairies by Fairfield World
Vintage Circus Strong Man by Life Anchored

Let's get social!

Your boys Halloween costumes from last year are super cute! My kids loved the caps for sale book and so did I:). Very cool!
ReplyDelete