But before we get to all of the pretty pictures, let me remind you where this all began. When we bought our house, we were a bit baffled by the five and a half feet of empty space in the corner of the kitchen.
As soon as we moved in to the house we painted the kitchen, and I was eager to tile the backsplash right away. But I knew that someday we would build out the corner of the kitchen, and that it would be much better to wait so that we could eventually have one seamless and continuous backsplash.
1. Bench for sitting down to remove wet shoes
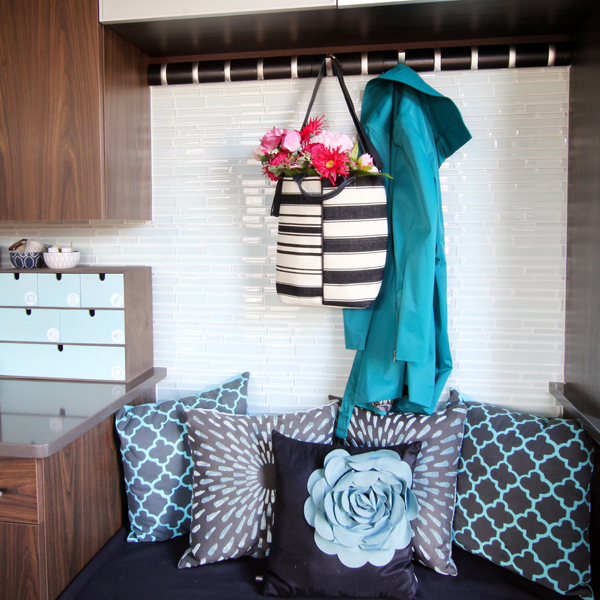
2. Hooks for hannging jackets, purses and backpacks
3. Storage for kitchen electrics
4. Storage for vases and extra glassware
5. Wine rack {solved by a wine rack console table on the other side of the kitchen}
6. Shelves for cookbooks
7. Shelves to display antique glass items from our grandparents
8. Tile beind the bench to prevent wet coats from damaging the wall
After ruminating over all sorts of different ideas, I finally hit upon an idea that would address everything on the wish list, and then some {other than the wine rack, as noted above}. As I often do before we commit to a plan, I created a rendering in Photoshop to help us envision what the finished product would look like.
Our existing kitchen cabinets were custom made, but the maker was no longer in business, meaning that we had to find a contractor who could construct matching cabinets, and we decided to also have the contractor do all of the tile installation at the same time. Because there are no windows adjacent to our kitchen prep area, we selected a glass tile that would help reflect the natural light in the kitchen and brighten up the space, and which would also tie in nicely with the frosted glass fronts on some of our upper cabinets.
Ok, enough talk of the plans! I am bursting at the seams to show you our completed kitchen mudroom!
Since we wanted this mudroom space to be both pretty and functional, we were careful to select materials that could stand up to the every day use. The backsplash tile was first and foremost in this regard. We had always wanted tile to run the length of the kitchen counters, and it was also important that we have tile below the coat hooks in order to protect the wall from wet jackets and umbrellas.
I am totally in love with the
Davinci tile we selected, which is in a random brick pattern and has a combination of glossy and frosted tiles. Not only is it gorgeous, we also got a killer price from Glass Tile Oasis during a major sale!
The bench cushion is a piece of thick foam that my mom covered for us in a black outdoor fabric, making it water resistant. The quaterfoil pillows are actually outdoor pillows, the second layer have a nice velvety-texture, and the flower pillow in the center was a Hobby Lobby find years ago that has been moving around the house and finally found it's home here on the mudroom bench.
Finally, the rug is very durable and has a short pile that makes it ideal for it's placement just inside the back door. The size of the rug was also important because I wanted it be span the distance from the door to the end of the bench, allowing plenty of space for multiple people to come in at the same time and remove wet or snowy shoes before continuing on to the hardwood floors. We already had this rug from Target in another room of our house, but when we brought it in to the kitchen it fit so perfectly that we knew it had to stay!
The glass-fronted cabinets above the coat hooks hold all of my vases, serving pitchers, and various other glassware. The cabinets below the bench provide additional storage for kitchen electrics, like our Crockpot and food processor.
Now let's talk about the coat hooks, shall we?! I am kind of obsessed with them! They are
Umbra Flip Hook Racks {affiliate link}, and I adore the way they flip out for use, but fold flat the rest of the time!
These racks come in several colors, but the dark wood is almost a perfect match to our kitchen cabinets. In order to achieve a truly custom, built-in look, I wanted the coat hooks the span the full width of the bench. The contractor tried to convince me otherwise, and originally installed two of the coat racks centered in the space, leaving a few inch gap on each side that he intended to fill with tile. But I stood my ground and insisted that he spread the two coat racks out, and cut down a third coat rack to fill the gap in the middle. The end result looks like one continuous piece, and the seams between the coat racks are nearly invisible.
That about sums up the "mudroom" portion of the kitchen addition. The cabinet and shelves on the far right provide ample storage for all of my cookbooks, as well as providing display space for some sentimental antiques from our grandparents.
We received quite a collection of cookbooks for our wedding, and I am thrilled to have a place to store all of these gorgeous books on open shelving where they can be seen and appreciated even when not in use. Cookbooks can be easily damaged if stored to close to the stove or in an area where they can get wet, so the location of these cookbook shelves - removed from the kitchen prep area - is ideal.
If you're from Denver, or have visited, you'll recognize the blue bear that holds up some of our cookbooks. He's the
miniature version of the 40 feet tall big blue bear that leans against the front of the Colorado Convention Center, peering into the lobby.
 |
| Convention center photo via |
The small countertop below these shelves is a perfect place to sit the books while I am flipping through them or while writing out my grocery list.
This small countertop used to also holds a cute little basket for our keys, sunglasses, and other items that we need to grab quickly on our way out the door. These items have since moved to the top drawer of the
shoe cabinet that we recently purchased.
The top two shelves display antiques that we were given to us by our grandparents. This is the only area where the contractor didn't quite deliver as promised. We had requested that a light be wired into the top of the cabinet so that we could light up these antiques. The contractor made the top shelf glass, as requested, to allow the light to shine through, but he failed to install a light. By the time we came home to discover this oversight, it was too late to add a hardwired light without taking down the newly installed cabinets. Instead, I did some research and purchased a thin, battery operated puck light to affix to the top of the cabinet. The light is not quite as bright or natural colored as we had hoped. Nonetheless, the light serves its purpose and I'm happy to have it there.

The Fire King Azurite Milk Glass tea cups and saucers were given to me by my grandma, and originally belonged to my great grandma, who collected them out of oatmeal boxes in the early 1950s. The Indiana Tiara Black Amethyst Glass Diamond Point mugs and covered candy dish were given to us by Scott's grandparents and are from the 1960s or 1970s.
Lastly, the cabinet below the cookbook shelves provides a bit of extra storage. It holds all of my cookbooks that are less display-worthy, as well as a file box that I use for organizing recipe clippings from magazines and menus for local restaurants. You can read all about that filing system
here.
I couldn't be happier with the way this project turned out! The contractor did such an amazing job of matching the cabinets that you would
never know that this mudroom was not part of the original kitchen!
Ok, ok. If you are
really observant then you may have noticed the one tiny detail that gives away the fact that the kitchen mudroom was an addition and not original... the feet on the cabinets don't match.
Unfortunately, the feet used on the original cabinets were discontinued, and despite intensive searching, we were unable to find a similar alternative.
But, we were able to find the next best thing - feet that are a nearly identical match to those on the oven. It's the little details!
For a little more perspective, here's how the mudroom corner of the kitchen looks from a bit further back...
Finally, I'll leave you with a few comparison photos so you can really appreciate this transformation.
First let's look at how the finished mudroom space compares to the rendering that I created during the
planning phase. It's really rewarding to see a plan come to life!
And finally, here are the before and after photos! Even though we lived with the empty space in our kitchen for years before adding in the "mudroom," it's hard for me to remember it ever looking like the before photo.
Of all of the ways that we could have utilized this formerly-dead space in our kitchen, I can't imagine any plan that would have better served the needs of our family! As a result of the custom cabinetry, this certainly wasn't the cheapest of the home improvement projects we've undertaken, but I can say without hesitation that it was worth every penny to have the kitchen mudroom feel like it was there from day one!